Zebra Printer Not Printing Entire Label
There are several proven troubleshooting steps to follow when your Desktop Zebra Printer isn’t printing the entire label.
If you’re dealing with any other Zebra printer issues, check out some of my other guides here: https://virtualtechland.com/?s=Zebra
Zebra Printer “Only Printing First Half of Label”
The first thing you want to ensure is that the label size is properly set and calibrated to the media in the printer driver. Once you confirm the settings are correct within the driver settings, you’ll want to check the settings on the zebra device through the printers’ user interface.
Once the settings are updated, try power cycling the printer if the labels are still only partially printing.
If all the settings are correct, you’ll need to reset the printer to defaults before re-configuring the printer. The last thing you’ll want to check is that your Zebra printer has a genuine power cable.
Keep reading for more details on the above trouble shooting steps.
Zebra Label Printer Not Printing the Entire Label – Troubleshooting
- Set the Correct Label Size in Printer Driver Settings
- Set the Media Size in Printer’s UI
- Calibrate the Media
- Power Cycle the Printer
- Reset Printer to Factory Defaults
- Check the power cable (Switch to a genuine one)
Step 1 – Set the Correct Label Size in Printer Driver Settings
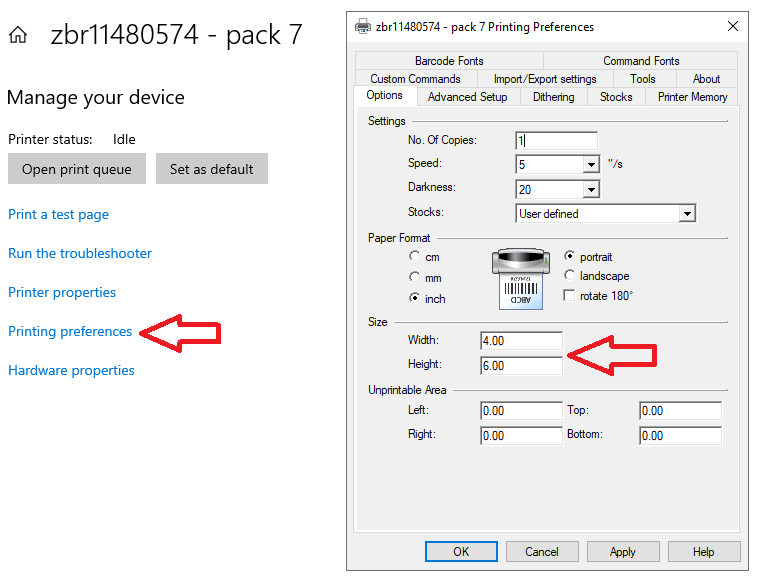
The first step to updating the label size is opening up your “Printers & Scanners” settings in Windows. Locate the desired Zebra printer and click the “Manage” button under it. You may need to click on the printer once before seeing the button.
Click “Printing Preferences” and then update the Width and Height fields (calculated in inches) in the window that pops up and click Apply then OK.
Step 2 – Set the Media Size in Printer’s UI
To access the user interface of a Zebra printer, you will need to connect the printer to a computer or network and use a web browser to access the printer’s web-based interface.
- Connect the printer to your computer or network using a USB cable or Ethernet cable.
- Open a web browser on your computer and type the IP address of the printer into the address bar.
- The IP address of the printer can be found by printing the Network Configuration page. Hold down the green “feed” button on the printer until a light blinks once and then release.
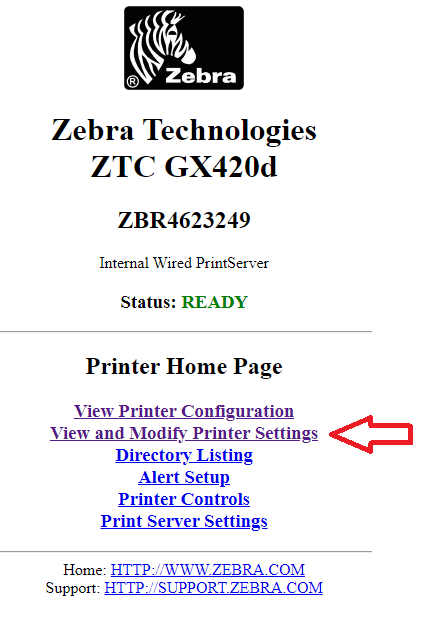
Click “View and Modify Printer Settings” and when prompted, enter the password for the printer and click “Submit Changes”. The default password on all Zebra models is 1234.
Next you’ll want tp click “Media Setup” and ensure that the print width and max length are both set to the max.
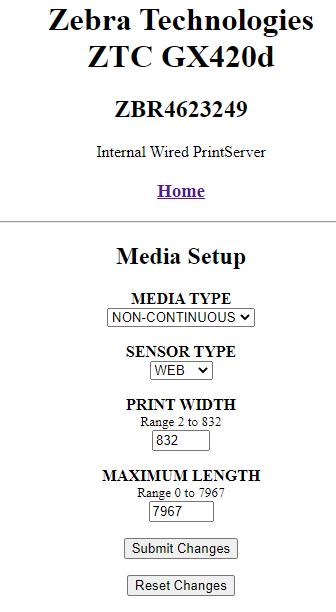
Lastly, you need to click “Submit Changes” and then click “View and Modify Printer Settings” and then click the button that says “Save Current Configuration”. If you only click the first Submit Changes button, your setting changes will only be temporary.
Step 3 – Perform a label calibration
Calibrating the printer to the specific labels you’re using will allow the printer to accurately print on the labels as well as precisely feed the labels while printing.
Press the feed button two to three times to allow the printer to calibrate the printer for the installed media. The printer may feed several labels during this process.
If you press the feed button too rapidly, the printer will pause and the indicator light will start flashing green. If you accidently pause the printer, you can press the feed button one more time to resume it.
Internet enabled Zebra Printers can be set to calibrate on power up and/or when you close the head of the printer. These settings are located in the web interface, which is accessed using the printers IP address.
When you’re constantly changing label sizes, setting the printer to calibrate every time you close the printer is extremely helpful.
Step 4 – Power Cycle the Zebra Printer
This is often the most overlooked step in troubleshooting printers and probably in all technical troubleshooting.
Power cycling an electronic device can reset its configuration parameters or can recover from an unresponsive state of its mission critical functionality.
This action also refreshes the memory stored locally on the printer (Random Access Memory aka RAM) giving it a clean slate.
How to Power Cycle a Zebra Printer
- Turn off the printer using the switch found at the back of the printer and then unplug it.
- Wait between 15-30 seconds to allow for all the power held in the printer to dissipate.
- Plug the printer back in and turn it back on using the power switch.
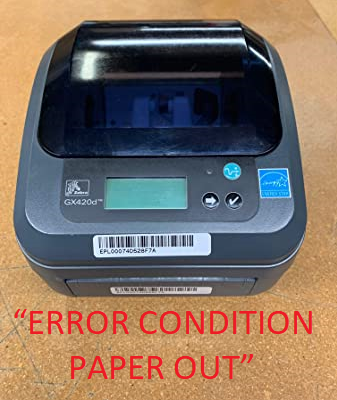
If you’re printer is still showing “ERROR CONDITION PAPER OUT”, continue to step 3.
Step 5 – Reset Printer to Factory Defaults
Navigate to Devices and Printers
Right click on the label printer
Click on Printing Properties
In the Properties screen, click on Printing Preferences
In the Printing Preferences, click on the Tools tab.
Select the Command Type: Action and the Command name: Load factory defaults
Click Send
Then select the Command name: Reset printer
Click Send
Step 6 – Check the power cable (Switch to a genuine one)
Most refurbished Zebra printers come with a non-genuine power cable that will provide enough power for some limited functionality. This can make troubleshooting more difficult, as most would rule the power cable out when trying to find the underlying issue. I’ve ran into this being that cause on several occasions and no longer use the free power adapters when sending these printers out to warehouses.

Conclusion
If the above steps didn’t help you solve this error, there are still a couple of steps you can take by reaching out to Zebra directly!
Before you contact Zebra, I recommend checking to see if your printer is still under warranty on Zebras Product Warranty Check page.
You can find the Serial number on the back or bottom of the label printer and enter that into their search tool. Having this serial number handy will prove useful when reaching out to the support team as well!
Contact Zebra Support:
By Phone: 1 877 ASK ZEBRA (1-877-275-9327)
By Email: https://supportcommunity.zebra.com/s/contactsupport?language=en_US
If support can’t help can’t solve this issue, you most likely have a broken or malfunctioning sensor and will have to Request a Repair.
I hope you found these Zebra Printer troubleshooting steps helpful! If this post helped you fix the issue or if you solved it some other way, be sure to leave me a comment below so that I can include it!