Zebra Printer Showing Paper Out Error (4 Easy Fixes!)
There are a number of proven troubleshooting steps to follow when your Desktop Zebra Printer is properly loaded and you get an “ERROR CONDITION PAPER OUT” error.
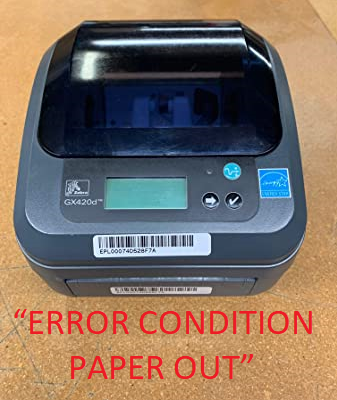
Zebra Printer “ERROR CONDITION PAPER OUT”
When your Zebra Label Printer has the message “ERROR CONDITION PAPER OUT” on the LCD screen or on the web interface, first make sure the roll of labels is properly loaded into the printer and power cycle the printer.
Next, open the printer and ensure that nothing is blocking the sensors that detect the labels. If there isn’t anything blocking the sensor and the printer still shows the same error, perform a label calibration.
These troubleshooting steps work on many desktop Zebra Direct Thermal and Thermal Transfer Printers including the ZP450, ZP505, GX420d, GK420d, ZD420/ZD421 and many more.
This guide is primarily for desktop Zebra printers. If you are having this issue with any Zebra Industrial label printers, please check out my post for the xi4 Series printers here.
Keep reading for more details on the above trouble shooting steps.
Zebra Label Printer “ERROR CONDITION PAPER OUT” – Troubleshooting
- Properly load the labels in the printer
- Power cycle the printer
- Clean off both top and bottom sensors
- Perform a label calibration
Step 1 – Properly load the labels in the Zebra printer
First, ensure the two sides of the label roll holder are properly fit inside of the core of the roll. This allows for a smooth pulling of the labels as it prints them out.
You also want to feed the labels though the guides on either side, which will maintain a straight and steady print job.
Some of these models of printers have a bottom sensor that slides to the left and right. You want this sensor to be in the middle of the labels so it can detect the gaps or marks properly. (More on this later!)
Please check out Philip Waters’ video on loading and resetting labels for a visual guide.
Step 2 – Power Cycle the Zebra Printer
This is often the most overlooked step in troubleshooting printers and probably in all technical troubleshooting.
Power cycling an electronic device can reset its configuration parameters or can recover from an unresponsive state of its mission critical functionality.
This action also refreshes the memory stored locally on the printer (Random Access Memory aka RAM) giving it a clean slate.
How to Power Cycle a Zebra Printer
- Turn off the printer using the switch found at the back of the printer and then unplug it.
- Wait between 15-30 seconds to allow for all the power held in the printer to dissipate.
- Plug the printer back in and turn it back on using the power switch.
If you’re printer is still showing “ERROR CONDITION PAPER OUT”, continue to step 3.
Step 3 – Clean off both top and bottom sensors
The Zebra Direct Thermal Desktop label printers have two gap sensors. One sensor is on the top of the printer just below the print head. The second sensor is under where the labels come out, just before the roller.
The upper web/gap sensor is responsible for detecting the gaps between the labels. The lower web/gap and black mark sensor does the same thing, but it also senses black lines found on specific labels.
Black lines are used on labels that don’t have a gap (butt cut”) or don’t have enough contrast between the liner and the labels. You can also use labels with black marks to work around a malfunctioning top sensor.
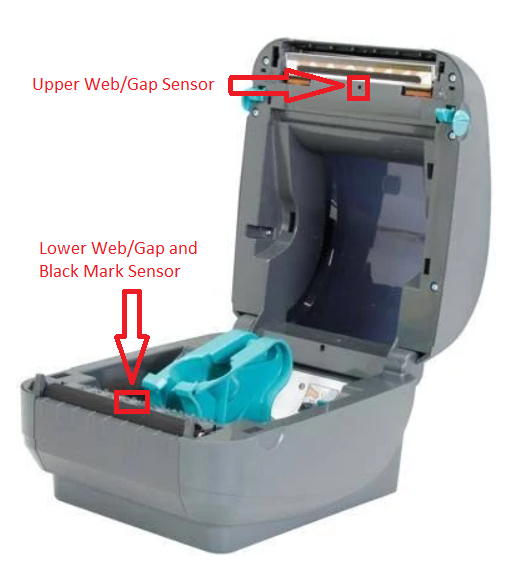
These sensors enable the printer to feed the label just far enough that you’re able to tear off the label and to prepare the next label for your next print job.
Torn pieces of labels or dirt can occasionally block these sensors leading the printer to believe there are no labels loaded in the printer.
Once you remove the piece of labels and/or clean these sensors off, head to the last troubleshooting step and perform a label calibration.
Step 4 – Perform a label calibration
Calibrating the printer to the specific labels you’re using will allow the printer to accurately print on the labels as well as precisely feed the labels while printing.
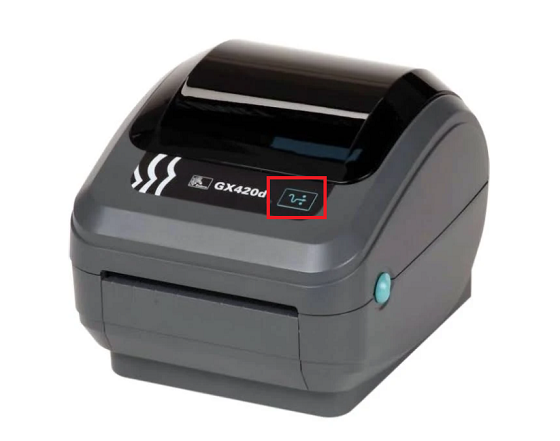
Press the feed button two to three times to allow the printer to calibrate the printer for the installed media. The printer may feed several labels during this process.
If you press the feed button too rapidly, the printer will pause and the indicator light will start flashing green. If you accidently pause the printer, you can press the feed button one more time to resume it.
Internet enabled Zebra Printers can be set to calibrate on power up and/or when you close the head of the printer. These settings are located in the web interface, which is accessed using the printers IP address.
When you’re constantly changing label sizes, setting the printer to calibrate every time you close the printer is extremely helpful.
Conclusion
If the above steps didn’t help you solve this error, there are still a couple of steps you can take by reaching out to Zebra directly!
Before you contact Zebra, I recommend checking to see if your printer is still under warranty on Zebras Product Warranty Check page.
You can find the Serial number on the back or bottom of the label printer and enter that into their search tool. Having this serial number handy will prove useful when reaching out to the support team as well!
Contact Zebra Support:
By Phone: 1 877 ASK ZEBRA (1-877-275-9327)
By Email: https://supportcommunity.zebra.com/s/contactsupport?language=en_US
If support can’t help can’t solve this issue, you most likely have a broken or malfunctioning sensor and will have to Request a Repair.
Replacing a broken sensor yourself is possible if you have some patience. Just be aware you will void any active warranty when you open it up.
I hope you found these Zebra Printer troubleshooting steps helpful! If this post helped you fix the issue or if you solved it some other way, be sure to leave me a comment below so that I can include it!
Hi Matt, great article here! The pictures were incredible and really helped me out with my printer. I cleaned off both of my sensors and it was running like new. Keep up the quality work!
Thank you for your good blog as always.Have a great day today